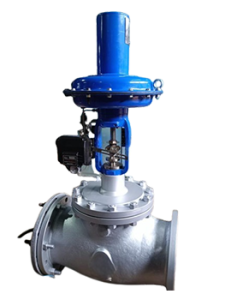
Pressure tanks are important for water pressure consistency, pump cycling reduction, and the efficient operation of water systems in residential and commercial applications. But just like any other mechanical device, pressure tanks need periodic servicing to avoid malfunction, maximize efficiency, and prolong their working lifespan. Good maintenance not only protects the integrity of the system but also reduces repair expenses as well as averts unplanned downtime.
In this hands-on guide, we will discuss necessary tips for pressure tank maintenance, avoiding system failure, and guaranteeing long-term reliability and effectiveness.
Why Pressure Tank Maintenance Matters
Pressure tanks work by holding water under pressure, minimizing the frequency of pump cycles. If not regularly maintained, problems like waterlogging, corrosion, and pressure irregularities may occur, causing system inefficiencies or even equipment failure.
✅ Top Advantages of Normal Pressure Tank Maintenance:
Prolongs the lifespan of the tank and associated equipment.
Ensures consistent water pressure and system performance.
Reduces pump cycling, preventing premature pump wear.
Minimizes the risk of system breakdowns and costly repairs.
Common Issues Affecting Pressure Tank Performance
Before diving into maintenance tips, it’s essential to understand the common issues that can affect the performance of a pressure tank:
❗ 1. Waterlogging
Waterlogging takes place when air and water combine within the tank, lowering the pressure-holding capacity of the tank. Waterlogging necessitates increased cycling of the pump, resulting in excessive wear.
❗ 2. Rust and Corrosion
Corrosion can compromise the internal and external parts of the tank, which can result in leakage or tank collapse. Corrosion is usually initiated by moisture contact, high humidity, or improper water treatment.
❗ 3. Inconsistent Flow and Pressure Loss
Inconsistent water flow or pressure loss can result when the air pressure in the tank is lower than what is preferred. This might be caused by leaks, defective valves, or a faulty bladder/diaphragm.
❗ 4. Failure of the Bladder or Diaphragm
Bladder and diaphragm pressure tanks may become worn out over time, causing rupture or loss of elasticity. A ruptured bladder permits water to fill the air space, in which case the tank will no longer be able to regulate pressure.
Important Pressure Tank Care Tips
Regular inspection, prompt repair, and following best practices are important for proper pressure tank maintenance. Here’s how to maintain your pressure tank properly and make it last long while performing efficiently.
✅ 1. Inspect the Pressure Tank Regularly
Regular checkups ensure the detection of preliminary signs of damage, corrosion, and possible breakdowns.
What to Look For:
Visible indications of rusting or corrosion on the tank’s outer surface.
Water collecting at the bottom of the tank, showing signs of leaks.
Strange sounds or oscillations when the pump runs.
Tip:
Perform visual checks at least every 3-6 months and repair any evidence of wear or damage in a timely manner.
✅ 2. Check and Set Air Pressure Regularly
It is essential to maintain the proper air pressure within the tank for maximum performance.
How to Check Air Pressure:
Switch off power to the pump and drain the tank.
Utilize a tire pressure gauge to check the pressure at the air valve (typically at the top of the tank).
It should be 2 psi lower than the cut-in pressure of the pump.
How to Set Air Pressure:
Add or let out air through an air compressor or a valve to the set pressure.
Tip:
Inspect the air pressure at least once every 6 months to guarantee consistent system performance.
3. Test the Tank’s Bladder or Diaphragm Integrity
In tanks that have bladders or diaphragms, regular testing confirms that these parts are still intact and functional.
Indicators of a Failing Bladder/Diaphragm:
Cycling pump frequently.
Loss of pressure or erratic water flow.
Waterlogged tank with minimal or no air pressure.
Method of Testing:
Press the air valve and see if water flows out, which means a blown bladder.
Pro Tip:
Replace the bladder or diaphragm at once if they exhibit signs of failure to avoid system inefficiencies.
✅ 4. Drain and Flush the Tank Occasionally
Draining and flushing the tank eliminates sediment accumulation, avoiding clogging and corrosion.
How to Drain and Flush the Tank:
Shut off the pump and turn off the water supply.
Open a bottom drain valve and let water discharge.
Flush out the sediment or debris with clean water.
Tip:
Regularly flush the tank every year to ensure peak performance and avoid sediment clogging.
✅ 5. Inspect and Clean Air Valves and Connections
Air valves and connections may clog up with dirt, debris, or corrosion over time, impacting the performance of the tank.
How to Clean Air Valves:
Use a soft cloth and mild detergent to clean the air valve and surrounding connections.
Check for leaks, cracks, or signs of wear.
Pro Tip:
Replace damaged or worn-out air valves to maintain system efficiency.
✅ 6. Protect the Tank from Freezing and Extreme Temperatures
Extreme temperatures can cause damage to pressure tanks, affecting their structural integrity and performance.
How to Prevent Freezing:
Insulate the tank and exposed pipes in winter.
Fit a heat source where there is a risk of freezing temperatures.
Tip:
In areas that are colder, make sure that the tank is fitted in a warm room.
✅ 7. Inspect for Leaks and Tighten Fittings
Leaks will decrease system pressure and cause inefficiency or damage.
How to Detect Leaks:
Inspect visually the tank and the pipes around it for indications of dampness.
Listen for hissing noises that can be a sign of air or water leaks.
Fixing Leaks:
Tighten loose fittings with a wrench.
Replace the broken seals or gaskets to avoid further leakage.
Tip:
Conduct leak checks during regular maintenance to identify potential problems early.
✅ 8. Check Pump Cycling and System Pressure
Excessive or erratic pump cycling can be a sign of a problem with the pressure tank or system.
Monitoring Pump Cycling:
Observe the pump’s operation during water usage.
Check for abnormally fast or slow cycling patterns.
How to Fix Cycling Issues:
Check air pressure and recharge if needed.
Check the bladder/diaphragm for integrity.
Tip:
Repeated pump cycling can shorten the life of the pump and pressure tank. Fix abnormal cycling patterns right away.
Signs That Your Pressure Tank Needs Replacement
Even with regular maintenance, pressure tanks do wear out and need to be replaced. Look out for these signs that signal it’s time for a replacement pressure tank:
Constant pump cycling even when maintaining proper air pressure.
Recurring waterlogging or loss of air charge.
Visible rust, corrosion, or structural damage.
Bladder or diaphragm failure that cannot be repaired.
Tip:
Replace the pressure tank before total failure to avoid pump and other system component damage.
Conclusion
Regular maintenance of your pressure tank is crucial to maintaining the longevity and efficiency of your water system. Regular inspections, air pressure checks, bladder/diaphragm testing, tank flushing, and early resolution of potential problems can help you avoid expensive repairs and prolong the life of your equipment. Proper maintenance not only improves system performance but also guarantees a consistent water supply, reduces pump cycling, and safeguards your investment in the long term.

